What is WordPress?
WordPress is an online, easy to use, and FREE open source website creating tool written in PHP. It is the most widely used CMS(content management system) and it is absolutely free to install and use. From blogging to e-commerce to business and portfolio websites, WordPress is a versatile CMS. It is very easy to use and requires no prior coding knowledge of you want to make simple and beautiful websites.
Who Uses WordPress?
Many famous blogs, news websites, music websites, and tech giants e.g TechCrunch, The New Yorker, BBC America and many more are using WordPress.
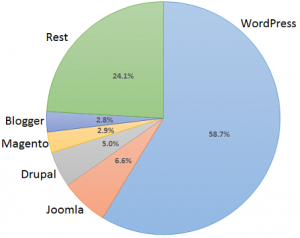
According to W3Techs, WordPress powers 32.0% of all the websites on the Internet, and if you limit the data set to only websites with a known CMS, WordPress’ market share gets even more dominant.
In that case, WordPress holds around 58% market share for content management systems on websites with a known CMS.
What do you need to get started?
To get started with, you need a domain and a hosting to host your website. There are a number of cheap hosting company’s out there on the internet and you can choose one to go with. Here is the guide which can help you in deciding which hosting company you can choose.
Once you have the hosting & domain then you need to install WordPress on your hosting. Don’t worry it is just a one-click install.
Guide to install WordPress on your hosting
Once the WordPress is installed on your hosting then you are good to move to the next step and let’s develop your beautiful website.
What are WordPress Themes and Plugins?
WordPress consists of Themes and Plugins which helps to develop the website even more easier. There are like a thousand’s of free themes available on WordPress theme directory and you can install whichever you want to but in this guide, we will be using OceanWP theme as it is very lightweight and easy to use for beginners. Now let’s talk about Plugins. Plugins are essentially extensions of WordPress. They take the core WordPress software, and change, enhance, add, or remove functionality.
Installing OceanWP theme on your WordPress Installation:
Login to your WordPress dashboard by going to www.yourdomainname.com/wp-admin and enter the username and password which you set at the time of WordPress Installation. Once you logged in then go to appearance -> themes. Click “Add New” to add a new theme. Once you click that, search for “OceanWP” to install the OceanWP theme. Click “Install” and then click “Activate” to activate the theme. Boom, your new theme is installed and activated. It is as simple as that to install a new theme. Let’s move to the next steps now.
What is Elementor?
Elementor is a page builder Plugin that replaces the basic WordPress editor(yes, WordPress comes with a basic editor plugin which can be complex for beginners) with a live frontend editor, so you can create complex layouts visually, and design your website live. It is free to use with limited features in its free version but you can always purchase the PRO version if you want more out of it. Elementor is extremely easy to use and you create any kind of page layout and can add text, images, button, and much more stuff by just dragging the things and dropping onto the page. Sounds fun? Let’s jump into this.
Installing Elemetor on your WordPress Installation:
Go to your WordPress admin dashboard again and then hover over to “Plugins” and click “Add New”. Search for “Elementor” and then install the “Elementor Page Builder” and click active. All done. The plugin is installed and activated now.
It’s time to add some pages to your website now. Often WordPress beginners get confused between posts and pages. By default, WordPress comes with two content types, posts, and pages. As a beginner, you are probably wondering what is the difference between them? It seems to have similar fields on the dashboard. It seems to look the same on the website. Why do I need both? When should I use posts? When should I use pages? Let’s figure out the difference.
Posts:
If you are using WordPress as a blog, then you will end up using posts for the majority of your site’s content. Posts are content entries listed in reverse chronological order on your blog’s home page. Right now I am writing this article from the Posts area as this is an article.
Pages:
Pages are meant to be static “one-off” type content such as your about page, privacy policy, legal disclaimers, etc. So if you are developing a nice informative website for your personal use or company then you will add the pages to your website by using the Pages area.
Adding a Page and editing with Elementor:
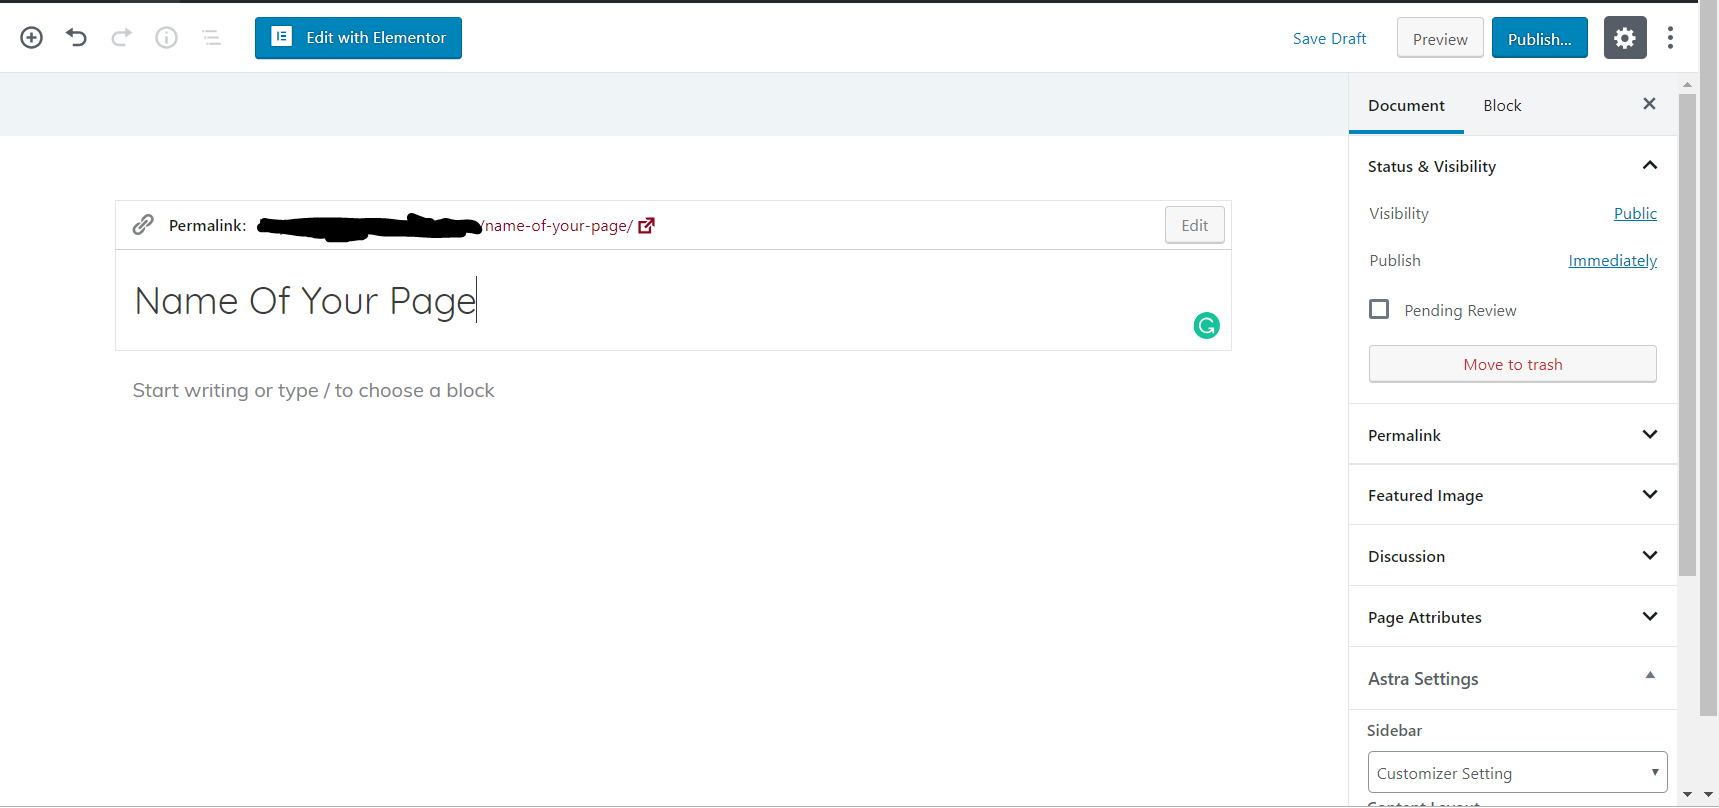
Go to WordPress admin and hover over to Pages from the left navigation bar and then click “Add New“. You will see a new interface now. Add the page title and then on the top of the page you will the button ‘Edit With Elementor’. Click it and the front-end editor will appear to edit the page.
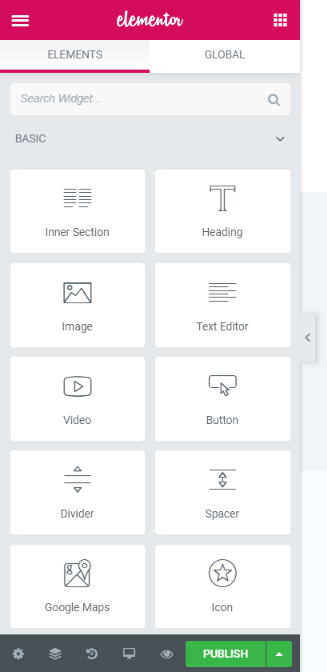
Play around with Elementor’s element available to add to your page. Drag any Element from the Elementor’s panel and drop onto your page and then adjust it accordingly. This will take some time to design your pages but you will love playing around. Once you are done editing your page then click Publish from the bottom of Elementor’s panel and the page will be saved and you can view it.
Add as many pages as you need to on your website. Once you are done adding all the pages then you need to add your pages to the menu. Go to the admin dashboard and then from Appearance click Menu. Once you are on the menu page, you need to name your menu anything and after that, you will be able to see the list of pages on the left side of the Page. Check the pages and add it to the menu and then click save.
Customizing the Header and adding logo and Menu to the Header :
Now let’s play around with the OceanWp theme which we installed. We can customize the header area to add our logo and our menu on the header. Go the admin dashboard and then hover over to “Appearance” and then click “Customize“. A new front-end customizer will appear to edit the header and many more things.
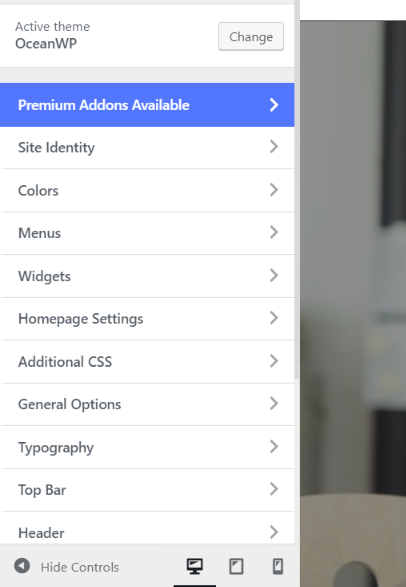
Check out each option because they are very handful and helpful to edit the header and general setting of your website. Once you are done making the changes then click “Publish” on the top to save the changes. Now your beautiful website is all done.
This is the basic guide on how you can make a WordPress website using the Elementor Page Builder. I hope we will be able to help you through this guide. If you are stuck with something and need help then just comment down with your issue and we will reply as soon as possible.



Leave a Reply